

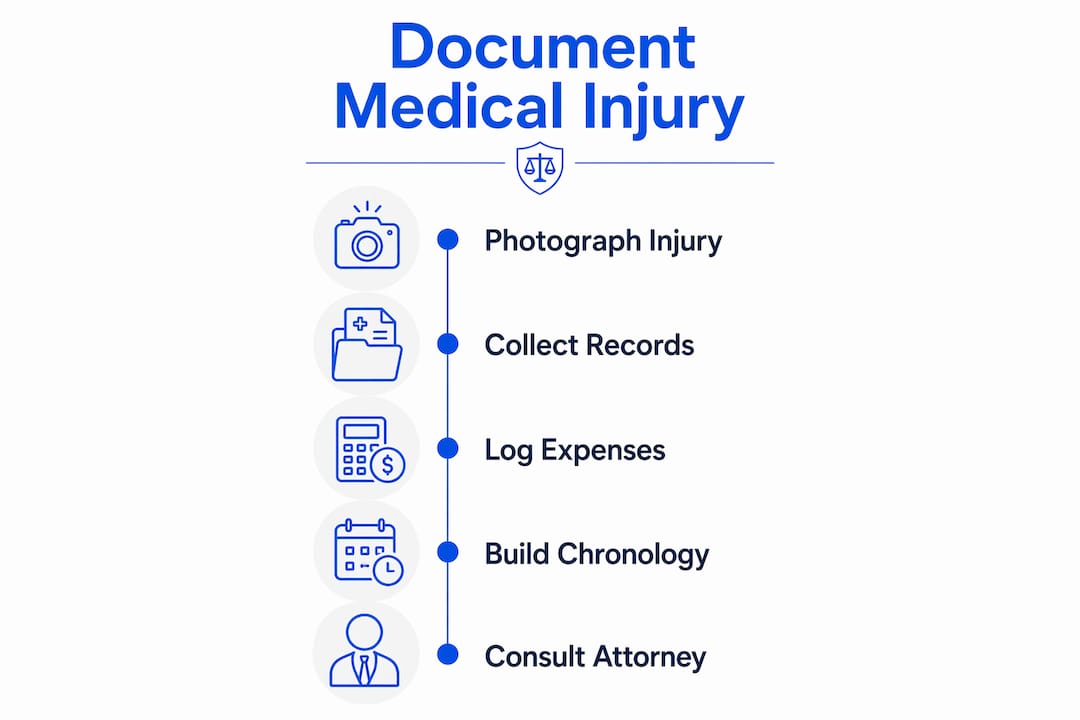
To document a medical injury effectively, take these steps immediately and keep every record:
- Seek emergency or urgent care first and tell every clinician exactly how the injury happened
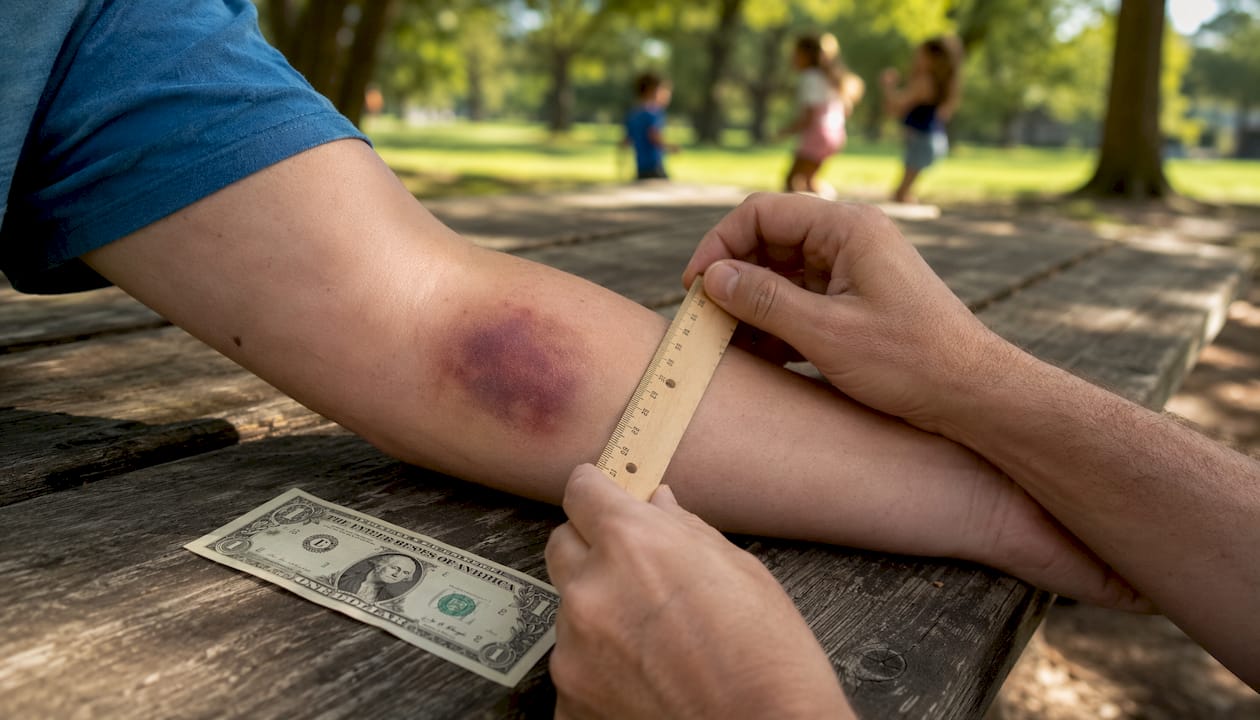
- Photograph visible injuries from multiple angles within hours, using a coin or ruler for scale
- Preserve the scene — photograph property damage, hazards, and any contributing conditions before they change
- Get witness names and direct contact information at the scene
- Start a symptom and daily-impact journal the same day, with timestamps
- Request copies of all medical records — ER notes, imaging, discharge summaries, prescriptions, and billing
- Save every bill, receipt, and pay stub tied to the injury and missed work
- Log every communication with insurers, adjusters, and providers (date, rep name, what was said)
- Back up all digital files to a secure cloud service immediately
- Contact a personal injury attorney early — especially if evidence is time-sensitive or disappearing
Your next step: begin organizing these records into a single medical chronology and reach out to Jewkesfirm for a free consultation and records-collection assistance.
Table of Contents
- Why documentation often determines what your claim is worth
- What to do at the scene and within the first 48–72 hours
- Which medical records do you need, and how do you request them?
- How to keep a contemporaneous pain and symptom journal
- Documenting medical bills, out-of-pocket costs, and lost income
- How to photograph and preserve physical evidence
- How to gather and document witness statements
- How to build a medical chronology and records index
- Legal timing and when to contact an attorney
- What to say and what to avoid in insurance statements
- Key Takeaways
- Why the checklist matters more than most people realize
- Jewkesfirm helps you build the evidence file that wins
- Authoritative sources and where to learn more
Why documentation often determines what your claim is worth
The difference between a fully paid claim and a disputed one often comes down to paperwork. Insurers and defense attorneys do not take your word for what happened or how badly you were hurt. They look at records, and if the records are thin, inconsistent, or missing, they use that against you.
Medical records created by treating providers at the time of care carry far higher evidentiary weight than anything you describe from memory months later. A treating physician’s contemporaneous note that says “patient reports neck pain following rear-end collision” is powerful. Your recollection of the same event at a deposition, without supporting records, is far easier to attack.
Disorganized records reduce settlement value. When an attorney or adjuster has to dig through hundreds of unsorted pages to find a key diagnosis, they may miss it entirely or simply undervalue the claim. A well-organized medical chronology distills that volume into a timeline that attorneys, judges, and juries can follow at a glance.
Defense teams routinely argue two things: that your injuries were pre-existing, and that you failed to mitigate damages by missing follow-up appointments. Thorough, contemporaneous records counter both arguments before they gain traction.
Defense counsel will search your pre-incident medical history for any prior complaints that overlap with your current injuries. Compiling your own baseline records first, before the defense does, lets your attorney address those issues proactively rather than reactively.
What to do at the scene and within the first 48–72 hours
Your three immediate priorities are medical care, photographs, and witness information. Everything else builds on those three.
- Call 911 or go directly to the emergency room. Do not delay care to gather evidence. Your health comes first, and an ER record created on the day of the injury is one of the most valuable documents in your case.
- Tell every clinician the mechanism of injury — exactly how it happened. “I was struck from behind at a stoplight” is more useful in a record than “I was in a car accident.” Vague descriptions create gaps defense attorneys exploit.
- Photograph injuries before treatment begins if you can safely do so. Bruising, lacerations, and swelling change rapidly. Photos taken in the ER waiting room or immediately after are far more compelling than photos taken two days later.
- Return to the scene as soon as it is safe and photograph everything: skid marks, broken glass, wet floors, uneven pavement, poor lighting, and any signage. Document the conditions that caused the injury.
- Collect witness information before people leave. Full name, phone number, email, and a brief description of what they saw. Do not rely on memory.
- Avoid handling hazardous physical evidence yourself. If a defective product, a piece of equipment, or a vehicle part is involved, photograph it in place and preserve it without altering it. Disturbing physical evidence can break chain of custody and hurt your case.
Pro Tip: Photograph injuries next to a common object for scale — a quarter, a ruler, or a pen. Then photograph the same injury again every 24–48 hours as bruising evolves. Courts and juries respond to visual progressions that show the severity and duration of harm.
Which medical records do you need, and how do you request them?
The records that matter most for causation, severity, and damages are: emergency room notes, imaging reports (X-rays, MRIs, CT scans), operative reports, physical therapy notes, specialist evaluations, prescriptions, and itemized billing statements. Request all of them, and request your pre-incident baseline records too.
Defense counsel will look for pre-existing conditions to argue that your current complaints stem from prior issues. Having your own baseline records on hand lets your attorney show exactly what changed after the incident.
Records-request checklist
- Emergency room notes and triage records
- All imaging reports and the actual image files (not just the radiologist’s summary)
- Operative and procedure reports
- Discharge instructions and summaries
- Physical therapy and rehabilitation notes
- Specialist consultation reports
- Prescription records and pharmacy logs
- Itemized billing statements (separate from the summary bill)
- Explanation of Benefits (EOB) from your insurer
- Pre-incident records from your primary care physician covering at least two years prior
Use a HIPAA-compliant authorization form from each provider. Request a specific date range that covers the incident date through your most recent visit, plus the pre-incident baseline period. Providers can take weeks to produce records, so submit requests immediately and follow up regularly.
Records-request log template
| Field | What to track |
|---|---|
| Provider name | Full name of facility or physician |
| Date requested | Date you submitted the authorization |
| Records requested | Specific record types and date range |
| Contact person | Name and direct phone/email |
| Date received | When records arrived |
| Copying fee paid | Amount and payment method |
| Notes | Follow-up calls, delays, partial production |
Billing records and itemized statements matter separately from clinical notes. An itemized statement shows every procedure code and charge, which ties directly to the damages calculation. A summary bill alone is not enough.
How to keep a contemporaneous pain and symptom journal
Start a journal the day of the injury and update it every day, even on days when you feel better. Consistency is what makes it credible. A journal that shows steady improvement, with specific setbacks noted, tells a far more believable story than one that only records bad days.
A contemporaneous personal injury journal is frequently recommended by attorneys because it proves symptom persistence and life impact when paired with clinical records. Clinical notes capture what a provider observed during a brief visit. Your journal captures what you lived with every hour of every day between those visits.
Daily journal entry template
- Date and time of entry
- Pain level (0–10 scale, by body part if multiple areas affected)
- Symptoms — describe specifically (burning, stabbing, stiffness, numbness)
- Activities you could not do (driving, lifting, sleeping, working, household tasks)
- Medications taken and whether they helped
- Effect on work — hours missed, tasks you could not complete, accommodations needed
- Emotional impact — anxiety, depression, sleep disruption
Pro Tip: Email your daily entry to yourself or a trusted family member. The email server timestamp creates an independent, verifiable record that is far harder to challenge than a handwritten notebook with no external verification. Apps like Day One or Google Keep with timestamps work well, but always export and back up entries to a secure cloud folder weekly.
Documenting medical bills, out-of-pocket costs, and lost income
Keep every bill, receipt, mileage log, and employer verification of missed work. Economic damages are only as strong as the paper trail behind them.
The specific financial items to preserve:
- Itemized medical bills from every provider
- Explanation of Benefits statements from your health insurer
- Receipts for prescription medications and medical equipment (crutches, braces, ice packs)
- Mileage logs for every trip to a medical appointment (the IRS medical mileage rate is a standard reference for calculating this)
- Parking and transportation receipts
- Pay stubs from before the injury and documentation of missed shifts or reduced hours
- A signed letter from your employer confirming dates missed and income lost
- Receipts for home care, childcare, or household help you needed because of the injury
For future costs, ask your treating physician to document projected ongoing treatment needs in writing. A life-care plan from a qualified expert can capture long-term costs that would otherwise go unclaimed.
Tie every expense to a specific medical record. A receipt for a knee brace means more when it is linked to the orthopedic note that prescribed it. A demand-ready damages worksheet that connects each cost to its underlying record is far more persuasive than a list of numbers without context.
How to photograph and preserve physical evidence
Clear, timestamped photos and video with a scale reference are among the most persuasive evidence you can present. Juries respond to images in ways that written descriptions cannot replicate.

Pro Tip: Never edit or filter injury photos. Send original files directly from your phone to a secure cloud folder — Google Photos, iCloud, or Dropbox — immediately after taking them. Original image files retain EXIF metadata (date, time, GPS coordinates) that authenticates when and where the photo was taken. Edited or filtered images lose that metadata and become easier to challenge.
Photo and video checklist:
- Immediate injury photos: all visible wounds, bruising, swelling, and abrasions from multiple angles, with a scale reference in frame
- Scene photos: the full environment, close-up hazards, vehicle damage, road conditions, and any contributing factors
- Clothing and personal property: torn, bloodied, or damaged items photographed before washing or discarding
- Ongoing injury photos: re-photograph healing injuries every 48–72 hours to document the progression
- Video walkthrough: a short video of the scene captures spatial relationships that still photos miss
For scene documentation, photograph from wide, medium, and close distances. Wide shots establish context; close shots show detail. Both are needed.
Physical evidence — a defective product, a broken stair railing, a piece of machinery — should be photographed in place, then stored without alteration. If possible, place it in a sealed bag or box and label it with the date, location, and a brief description. Chain of custody begins the moment you take possession of it.
How to gather and document witness statements
Collect names, direct contact details, and a brief contemporaneous account from every witness before they leave the scene. Memory fades fast, and witnesses become harder to locate with each passing day.
A compact witness form to use at the scene or immediately after:
- Full name
- Phone number and email
- Relationship to the incident (bystander, employee, other driver)
- Brief written account of what they saw (in their own words, not yours)
- Date and time of the statement
- Signature, if they are willing
Dos and don’ts when speaking to witnesses:
- Do ask open-ended questions: “What did you see happen?”
- Do write down their account as close to verbatim as possible
- Don’t suggest details or lead them toward a particular version of events
- Don’t ask them to speculate about fault or speed
- Do follow up by email within 24 hours to confirm their contact information
Store witness information in your records log alongside your medical records. If a witness later provides a signed statement, scan it and add it to your indexed file with a date and source notation.
How to build a medical chronology and records index
Create a single master medical chronology the moment records begin arriving. Every entry should include the date of service, provider name, record type, key findings, treatment provided, and a page reference or file name pointing to the exact source document.
A well-organized chronology distills hundreds of pages into a timeline attorneys, judges, and juries can follow. It also makes your attorney’s job faster and your case stronger.
Medical chronology spreadsheet template
| Date of service | Provider | Record type | Key findings | Treatment | File reference |
|---|---|---|---|---|---|
| — | Memorial ER | ER notes | Cervical strain, L2 contusion | Immobilization, pain meds | ER_record_p1-8 |
| — | Dr. Smith, Ortho | Consult | Herniated disc L4-L5 | MRI ordered | Ortho_record_p1-3 |
Use consistent file naming: Provider_Date_RecordType_Pages (e.g., PhysicalTherapy_04012026_Notes_p1-12). This makes every document findable in seconds.
Pro Tip: Flag any gap in treatment directly in the chronology with a brief explanation — “No visit 04/10–04/28: awaiting insurance authorization for specialist referral.” Insurance adjusters look for gaps and will argue you failed to mitigate damages. A documented explanation preempts that argument before it is ever raised.
Providers can take weeks to produce records, so maintain a separate records-request log (the template in the medical records section above) and follow up every 10–14 days until every request is fulfilled.
Legal timing and when to contact an attorney
Consult an attorney early, especially if evidence is at risk of disappearing or if you expect litigation. Statutes of limitations vary by state, and missing the deadline means losing your right to sue entirely.
Social media is one of the most common ways injured people inadvertently damage their own cases. A single photo of you at a social event, or a post saying you “feel great,” can be used by defense counsel to contradict your claimed limitations. Avoid posting about your injury, your activities, or your case on any platform until it is resolved.
Additional cautions:
- Do not delete texts, emails, or voicemails related to the incident or your treatment
- Do not give a recorded statement to an insurance adjuster without first speaking to an attorney
- Do not sign any release or settlement agreement without legal review
When an attorney is involved, they can issue a litigation hold, a formal notice to relevant parties requiring them to preserve emails, texts, surveillance footage, and other digital evidence that might otherwise be deleted in the normal course of business. That hold can be the difference between key evidence surviving and disappearing.
For Georgia-specific timing and case workflow guidance, Jewkesfirm offers free consultations with no obligation.
This article provides general information, not legal advice. Confirm current deadlines and rules with a licensed attorney in your state.
What to say and what to avoid in insurance statements
Be brief, factual, and avoid speculating about fault or future treatment in any statement to an insurer. What you say in the first days after an injury can be used against you for the life of the claim.
Dos and don’ts for insurance statements
| Do say | Avoid saying |
|---|---|
| “I was injured in the incident on [date].” | “I think it was mostly the other driver’s fault.” |
| “I am receiving medical treatment.” | “I feel fine” or “I’m okay.” |
| “I will provide medical records as they become available.” | Speculating about how long recovery will take |
| “I’d like to consult my attorney before giving a recorded statement.” | Agreeing to a recorded statement on the spot |
| “The incident occurred at [location] at approximately [time].” | Guessing at details you are not certain about |
Safe language for written statements:
- “On [date], I sustained injuries as a result of [brief factual description of incident].”
- “I am currently under the care of [provider type] for injuries related to this incident.”
- “I will forward itemized medical records and bills as they are received.”
Log every adjuster interaction in a dedicated communication log: date, adjuster’s name and direct number, what was discussed, any offer amounts mentioned, and what you said in response. Documenting these interactions creates a record that protects you if an adjuster later misrepresents what was agreed.
If an adjuster pressures you for a recorded statement, it is always appropriate to say: “I need to review my records and speak with my attorney before I can respond to that request.” That sentence alone can protect you from a premature statement that undervalues your claim.
Key Takeaways
Thorough, contemporaneous documentation of a medical injury — from the scene through every provider visit — is the single most effective way to protect the full value of a personal injury claim.
| Point | Details |
|---|---|
| Start immediately | Photograph injuries and the scene within hours; delays allow evidence to disappear or change. |
| Build a medical chronology | Organize every record by date, provider, and file reference so attorneys and adjusters can follow the timeline. |
| Journal daily | A timestamped symptom journal proves persistence and life impact that clinical notes alone cannot capture. |
| Track every dollar | Save itemized bills, receipts, mileage logs, and employer wage-loss letters to document full economic damages. |
| Jewkesfirm can help | Jewkesfirm offers free consultations and handles records requests, chronology building, and insurer communications for injury victims in South Atlanta and surrounding Georgia counties. |
Why the checklist matters more than most people realize
Most people underestimate how quickly the evidentiary window closes after an injury. Bruising fades in days. Witnesses scatter. Surveillance footage is overwritten on 72-hour loops. The scene gets cleaned up. By the time someone decides to pursue a claim, the most compelling visual and physical evidence is often gone.
What remains is the paper trail. And the quality of that paper trail, how organized it is, how contemporaneous, how complete, determines whether an insurer pays full value or disputes causation entirely. Defense teams are not guessing when they argue pre-existing conditions or gaps in treatment. They are reading the same records you have, looking for the same gaps you left unfilled.
The checklist in this article is not bureaucratic busywork. It is the difference between a claim that settles at full value and one that gets picked apart. Organized evidence changes the negotiation before it starts. An adjuster who receives a complete, indexed medical chronology with a demand letter tied to specific records faces a very different conversation than one who receives a stack of unsorted bills.
At Jewkesfirm, the attorneys have seen both sides of that conversation. The cases that resolve well share one common trait: the client documented everything, early, and kept it organized.
*— Ali
Jewkesfirm helps you build the evidence file that wins
When you are recovering from an injury, tracking down medical records, logging adjuster calls, and building a chronology is the last thing you have energy for. Jewkesfirm handles that work so you can focus on getting better.

The firm’s attorneys and staff assist injury victims in South Atlanta and surrounding Georgia counties with records requests submitted directly to providers, medical chronology creation, expert referrals for life-care planning, settlement negotiation backed by organized evidence, and full litigation when insurers refuse to pay fair value. There are no upfront fees. Jewkesfirm works on a contingency basis, meaning you pay nothing unless the firm recovers compensation for you.
To get started, schedule a free consultation with Jewkesfirm. Bring whatever records you have — even a partial file is a starting point. The firm will identify what is missing, submit the necessary requests, and begin building the chronology that supports your claim from day one.
Authoritative sources and where to learn more
- American Bar Association — Typical Personal Injury Case: Overview of how personal injury cases proceed, from filing through settlement or trial.
- LegalClarity — How to Prepare a Medical Chronology: Detailed guidance on building a medical chronology with the fields attorneys and courts rely on.
- Nolo — How to Preserve Evidence After an Accident: Practical steps for preserving physical and documentary evidence, including pre-existing condition records.
- GSA — Privately Owned Vehicle Mileage Reimbursement Rates: The federal reference rate for calculating medical mileage in damages worksheets.
- California Department of Insurance — After an Accident: Consumer guidance on what to document and report after an accident; useful as a general reference even outside California.
- Jewkesfirm Blog — Personal Injury Checklist 2026: A printable checklist and step-by-step guide for protecting a personal injury claim, authored by the Jewkesfirm team.
- Jewkesfirm Blog — How to Document Accident Injuries: Scenario-specific documentation tips for different accident types, including auto collisions, slip and falls, and workplace injuries.
Save copies of these resources and follow up with a licensed attorney in your state for jurisdiction-specific rules, deadlines, and forms.